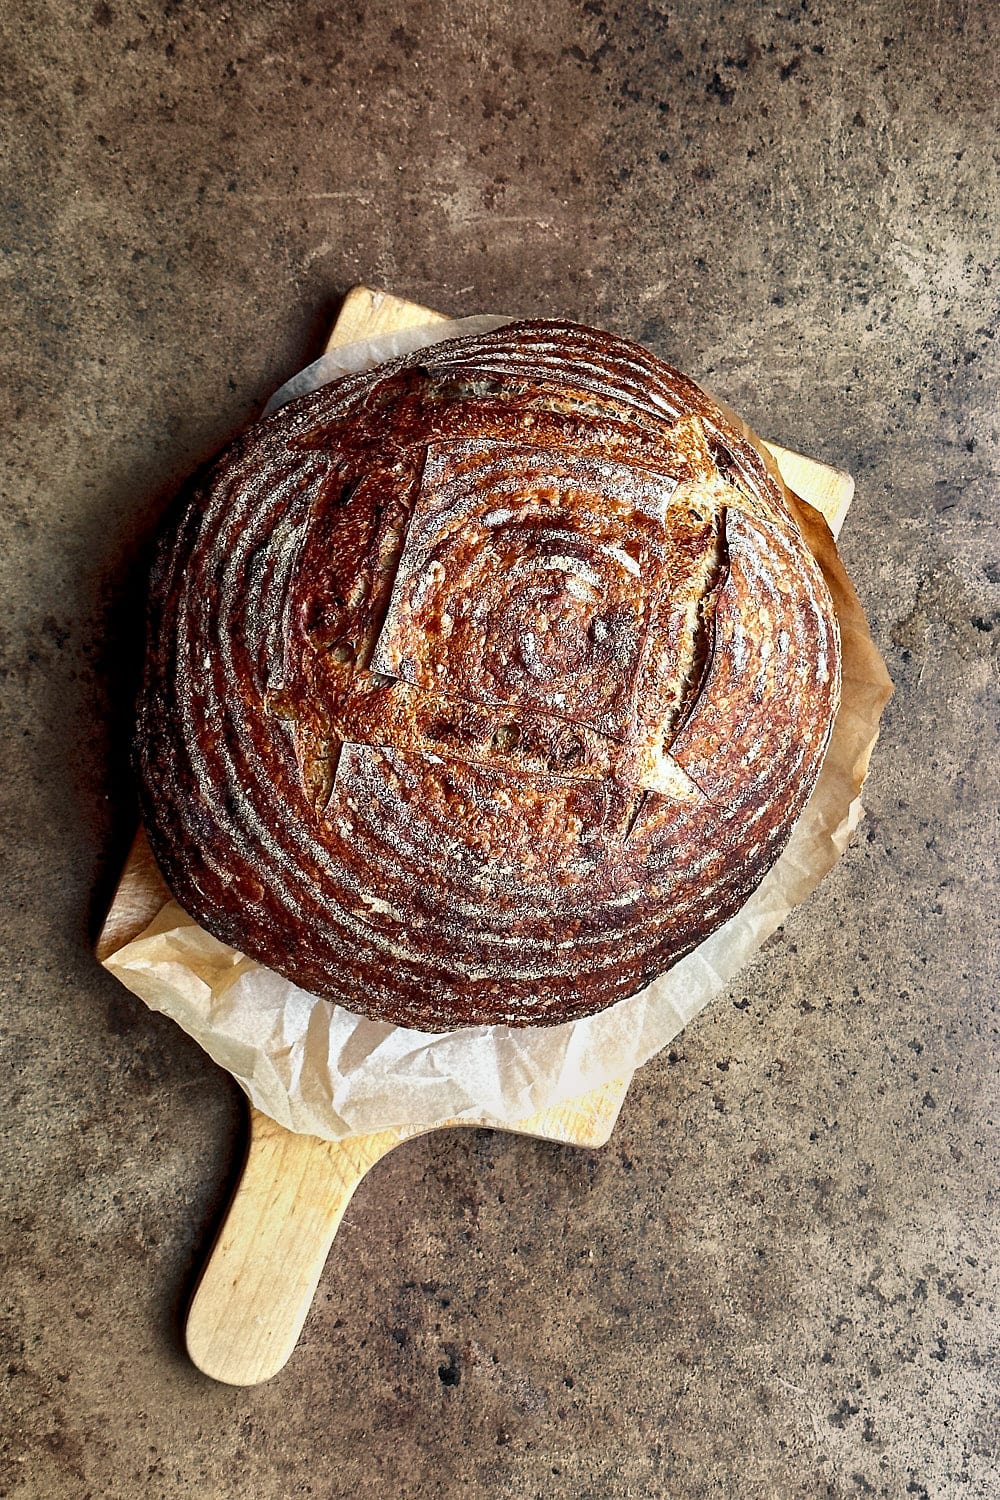
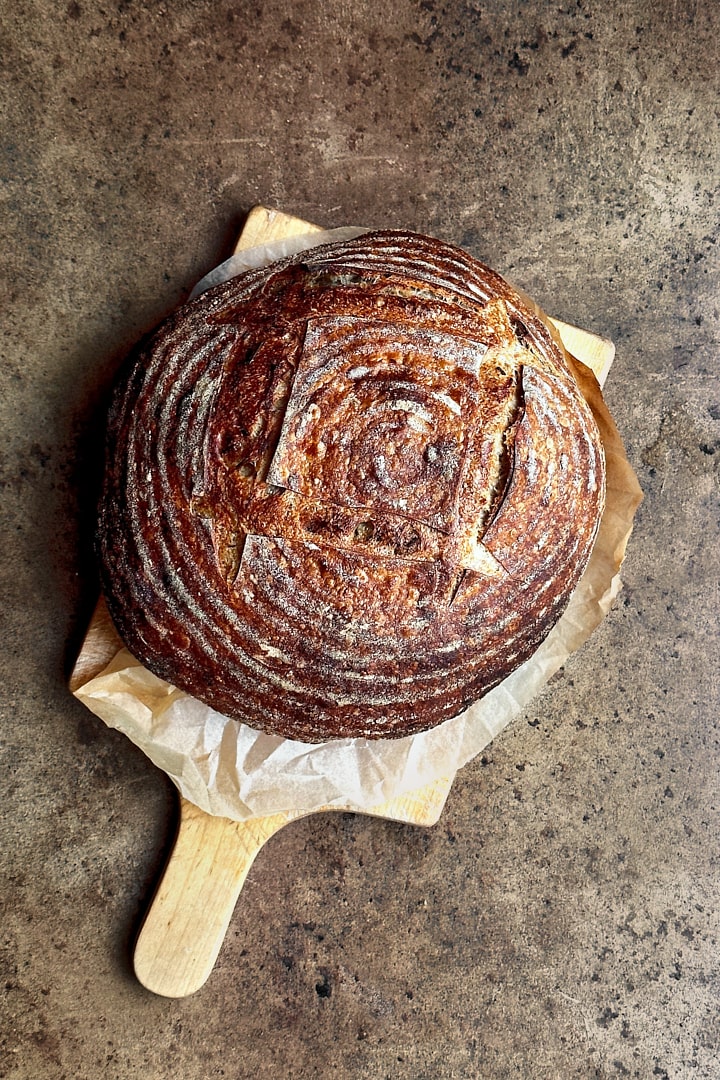
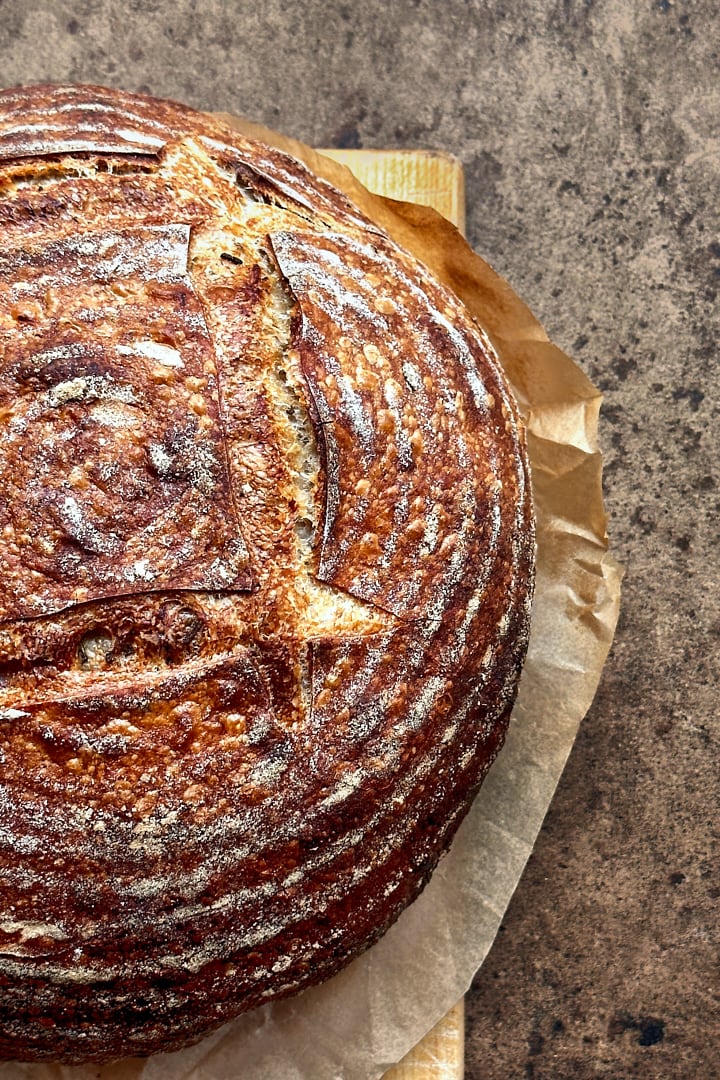
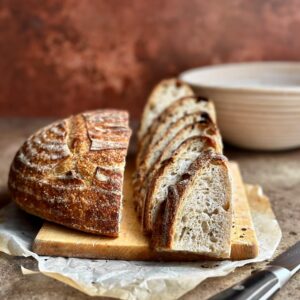
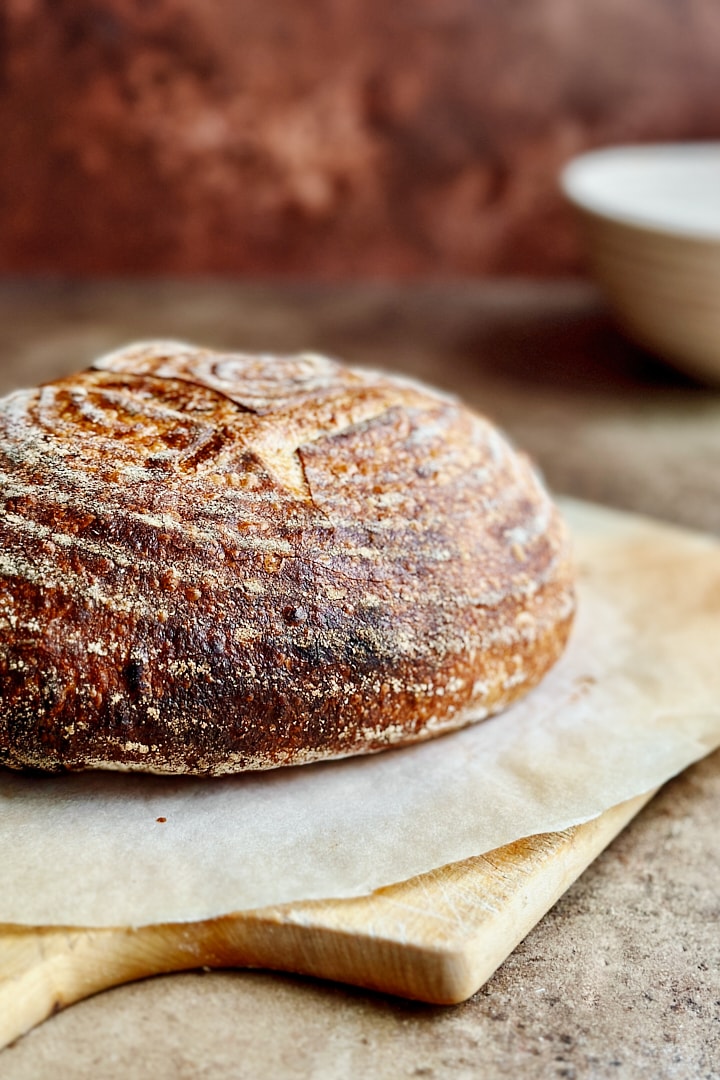
Roasted Garlic Sourdough Bread With Rosemary and Olive Oil
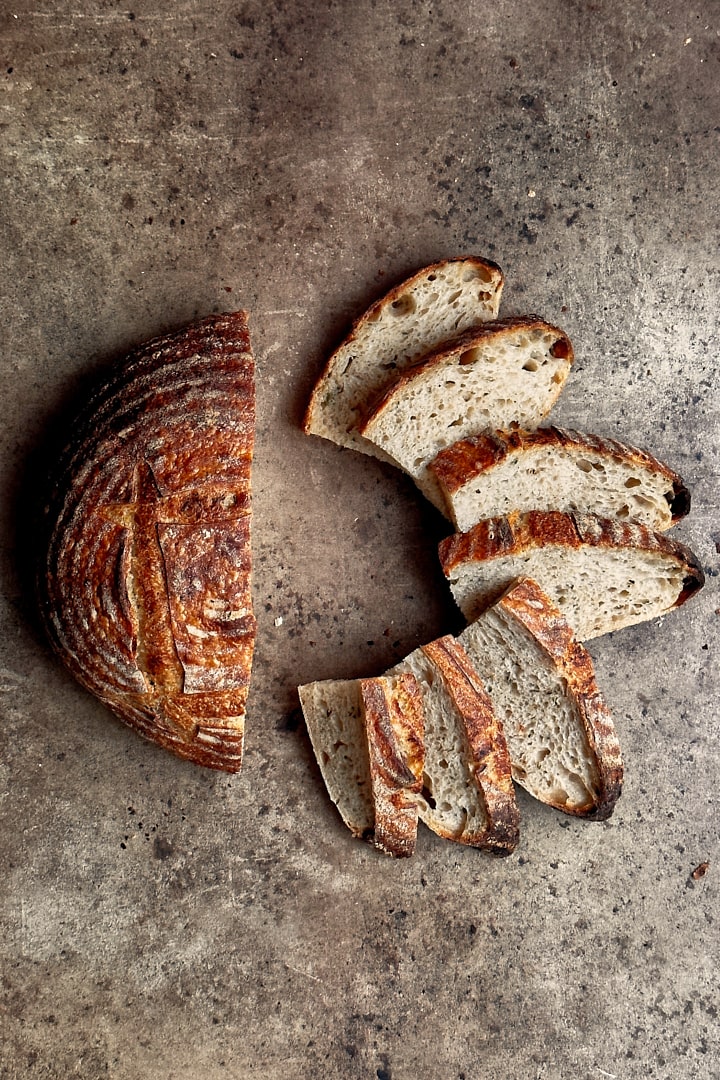
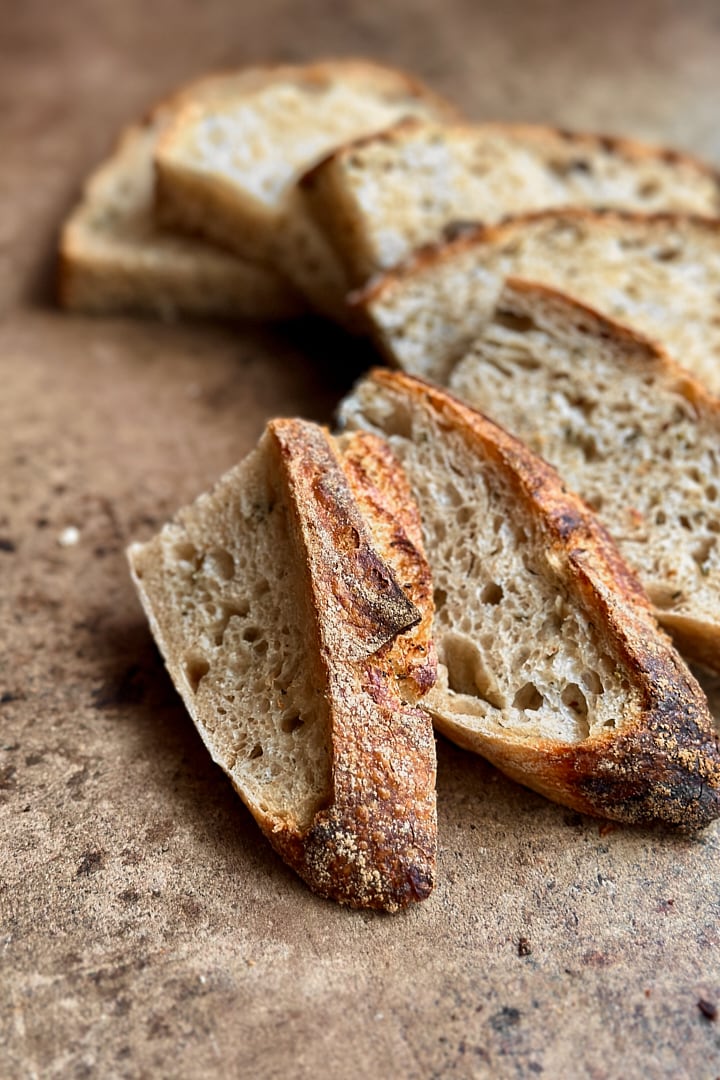
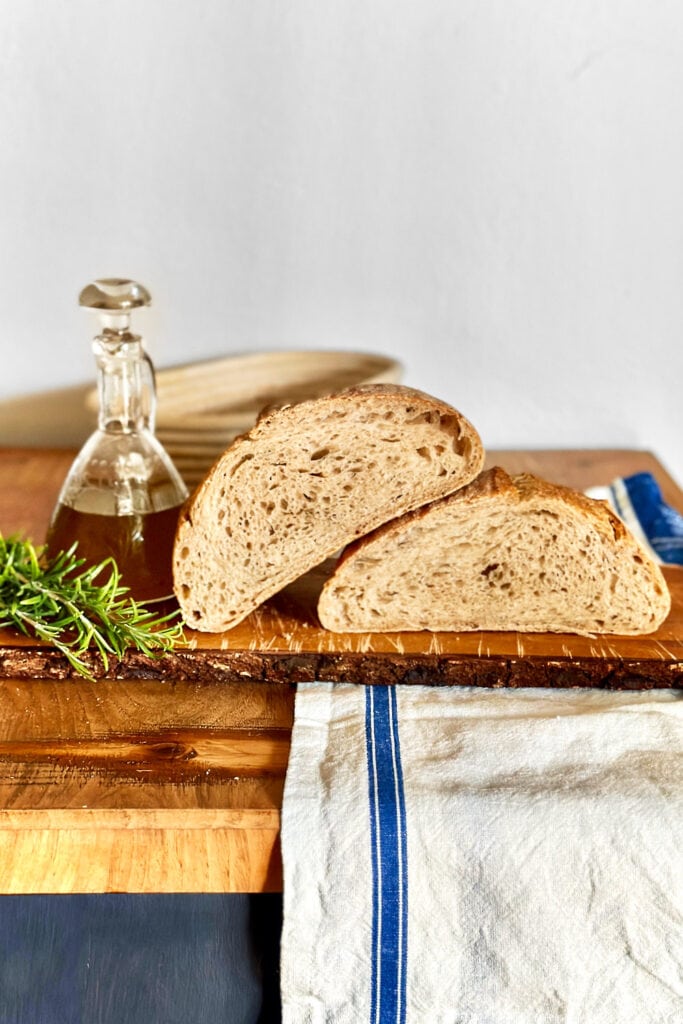
This roasted garlic sourdough bread with rosemary and olive oil is a flavorful and savory twist on classic sourdough bread. It’s made with simple ingredients and involves roasting one head of garlic in the oven until soft and caramelized before adding it to the dough. This transforms the sharpness of raw garlic into a nutty and slightly sweet taste. The result is a crusty golden loaf with a tender and flavorful crumb. Enjoy this bread toasted with a bit of butter or as a perfect side dish for soups, stews, and salads.
Ingredients and Tools You’ll Need
Step-by-Step Instructions
Step 1
The evening before, make the stiff leaven: Dissolve the sourdough starter in the water and add the flour. Mix well to combine. The leaven will have a stiff, dough-like consistency. You can briefly knead it on the counter to make sure there aren’t any dry bits of flour left. Let it rise in a glass jar overnight at room temperature. The next morning, it should look bubbly, active and doubled or tripled in size.
Step 2
The next morning, make the main dough: In a large mixing bowl, dissolve the active leaven in the water and add both flours. Using a dough whisk, mix everything together until the flour is fully incorporated and a shaggy dough forms. Cover the bowl with a damp towel and let it rest for 30 minutes at room temperature.
Step 3
Add the salt and knead it in with wet fingers to prevent the dough from sticking to your hands. Slap & fold the dough on the counter for a few minutes to develop dough strength. This takes about 3 – 5 minutes. Afterwards, the dough should feel smooth and elastic. Transfer it to a lightly oiled bowl and let it rise in a warm spot (25° – 28° C) for the bulk fermentation.
Step 4
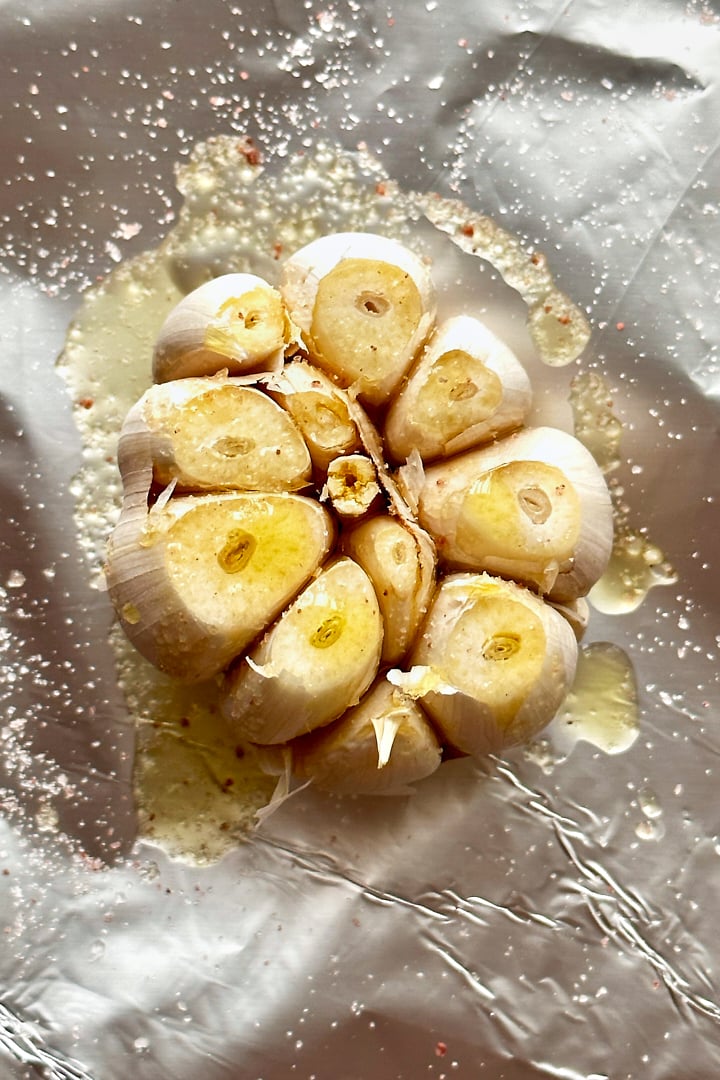
Make the roasted garlic paste: Pre-heat the oven (a small toaster oven works great for this) to 200° C. Take one whole head of garlic and remove any loose outer layers of the papery skin. Using a very sharp knife, cut off the top part of the garlic head, exposing the cloves. But make sure that the head stays intact and doesn’t fall apart. Place the garlic on a piece of aluminum foil, drizzle it with some olive oil and sprinkle it with a pinch of salt. Wrap the foil around the garlic to create a little packet. Place the foil packet on a baking tray in the hot oven and roast it for about 30 minutes, until the cloves are soft and caramelized. Remove it from the oven and let it cool for about 15 – 20 minutes, until cool enough to handle. Unwrap the garlic and use your fingers to squeeze out the individual cloves into a small bowl. They should be very soft and release easily from the skin. Add a tablespoon of olive oil to the bowl and mash the garlic into a smooth paste. Cover the bowl with plastic wrap and set it aside.

Step 5
During the bulk fermentation, you will perform three sets of coil folds and one dough lamination to incorporate the garlic paste and rosemary into the dough. The first coil fold is done 30 minutes after you begin the bulk fermentation stage. Then, repeat the folds two more times in 30 minute intervals. This strengthens the dough and improves the structure and appearance of the bread.
Step 6
After the last coil fold, let the dough rest for 30 minutes. Then, lightly spray your work surface with water and dump the dough out onto the surface. With wet hands, gently stretch the corners and edges of the dough outwards. Try to stretch it out as thin as possible but make sure to not tear it. Evenly spread the garlic paste over the dough and sprinkle it with the chopped rosemary. Fold the dough back up into a little package. Let the dough rise in a warm spot for another 1.5 hours until it looks bubbly and increased in size (about 50% increase). If the dough still looks dense, let it rise longer.
Step 7
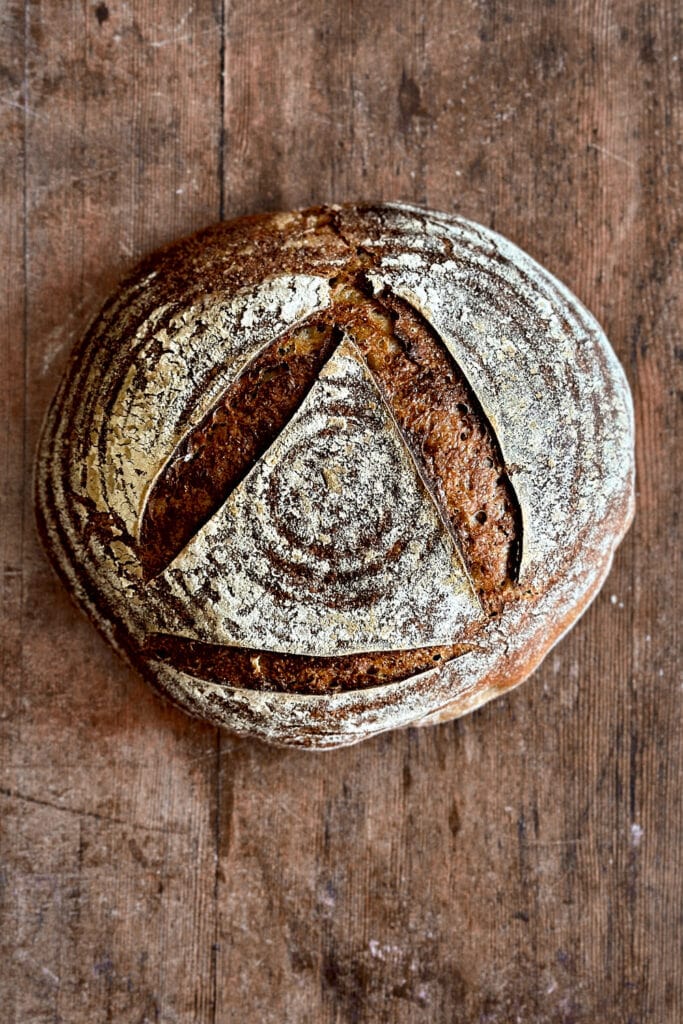
Once the dough looks soft and airy, dump it onto your work surface and pre-shape it into a loose round. Let it rest for 30 minutes. Using a bench scraper, flip the dough over and shape it into a round loaf. Place it into a floured banneton with the seam-side facing up. Cover the banneton with a plastic bag and place it in the fridge overnight for the final proof. The cold, slow fermentation provides extra flavor and aroma.
Step 8
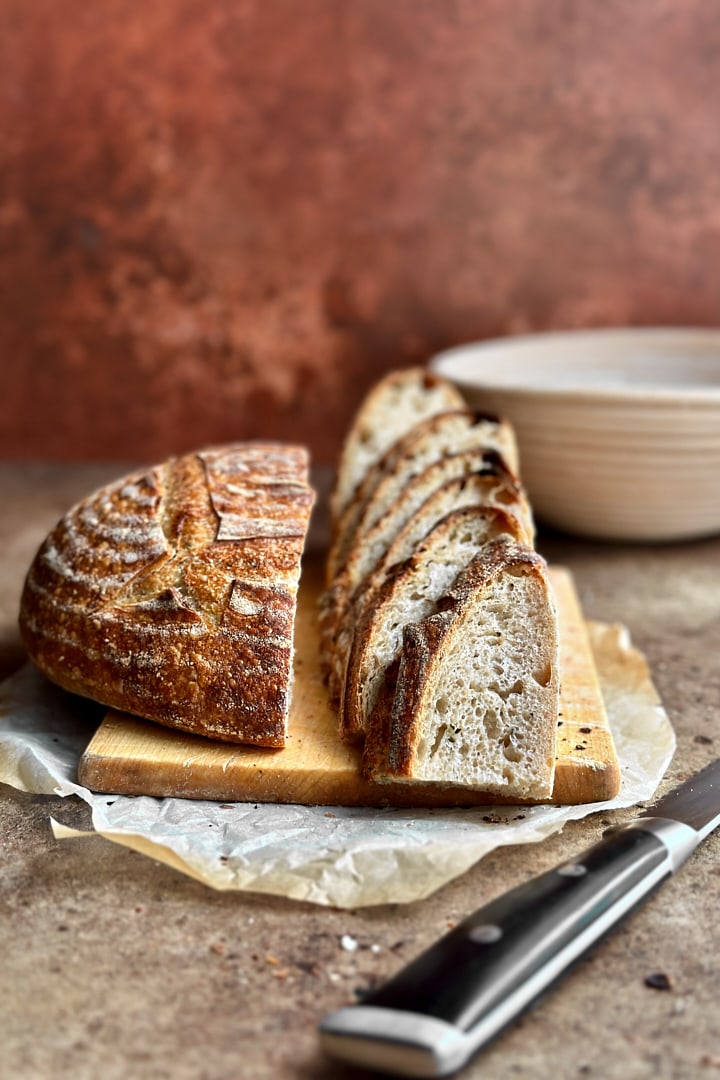
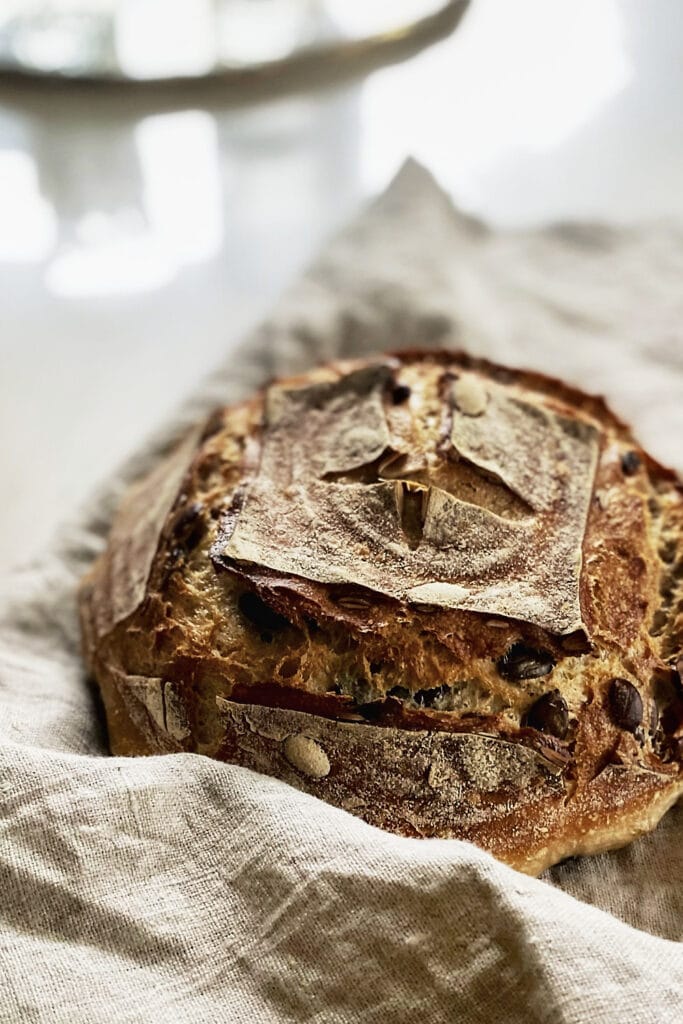
The next day, pre-heat the oven to 230° C. Turn the dough out of the banneton onto a piece of parchment paper. Using a sharp knife, score the top of the dough and bake the bread with steam for the first 10 minutes. Then, briefly open the oven door to release the steam and finish baking for another 20 – 25 minutes, until deeply golden brown. The baking time may vary depending on your oven. The bread is done baking, if it sounds hollow when tapping the bottom of the loaf with your knuckle. You can also use an instant-read thermometer to check for doneness. The internal temperature should reach at least 93° C. Remove the bread from the oven and let it cool completely before slicing. This allows the internal structure of the bread to set and improves the crumb. Slicing the bread too soon can result in a gummy or doughy texture.
Sample Baking Schedule
Day 1
Day 2
Day 3
More Sourdough Recipes You May Like:


Roasted garlic sourdough bread with rosemary and olive oil
Equipment
- Dough whisk
- Dough scraper
- Parchment paper
- Round proofing basket
Ingredients
For the leaven:
- 30 g sourdough starter
- 30 g water – lukewarm
- 60 g flour
For the main dough:
- 100 g active leaven – keep the rest of the leaven in the fridge for the next use.
- 310 g bread flour
- 40 g whole wheat flour
- 285 g water
- 9 g salt
- 1 whole head of garlic
- 2 tbsp olive oil
- 2 sprigs fresh rosemary – chopped
Instructions
To make the leaven:
- The evening before, make the stiff leaven: Dissolve the sourdough starter in the water and add the flour. Mix well to combine. The leaven will have a stiff, dough-like consistency. You can briefly knead it on the counter to make sure there aren’t any dry bits of flour left. Let it rise in a glass jar overnight at room temperature. The next morning, it should look bubbly, active and doubled or tripled in size.
To make the main dough:
- The next morning, make the main dough: In a large mixing bowl, dissolve the active leaven in the water and add both flours. Using a dough whisk, mix everything together until the flour is fully incorporated and a shaggy dough forms. Cover the bowl with a damp towel and let it rest for 30 minutes at room temperature.
- Add the salt and knead it in with wet fingers to prevent the dough from sticking to your hands. Slap & fold the dough on the counter for a few minutes to develop dough strength. This takes about 3 – 5 minutes. Afterwards, the dough should feel smooth and elastic. Transfer it to a lightly oiled bowl and let it rise in a warm spot ( 25° – 28° C) for the bulk fermentation.
- Make the roasted garlic paste: Pre-heat the oven (a small toaster oven works great for this) to 200° C.
- Take a whole head of garlic and remove any loose outer layers of the papery skin. Using a very sharp knife, cut off the top part of the garlic head, exposing the cloves. But make sure that the head stays intact and doesn’t fall apart. Place the garlic on a piece of aluminum foil, drizzle it with some olive oil and sprinkle it with a pinch of salt. Wrap the foil around the garlic to create a little packet. Place the foil packet on a baking tray in the hot oven and roast it for about 30 minutes, until the cloves are soft and caramelized. Remove it from the oven and let it cool for about 15 – 20 minutes, until cool enough to handle. Unwrap the garlic and use you fingers to squeeze out the individual cloves into a small bowl. They should be very soft and release easily from the skins. Add a tablespoon of olive oil to the bowl and mash the garlic into a smooth paste. Cover the bowl with plastic wrap and set it aside.
- During the bulk fermentation, you will perform three sets of coil folds and one dough lamination to incorporate the garlic paste and rosemary into the dough. The first coil fold is done 30 minutes after you begin the bulk fermentation stage. Then, repeat the folds two more times in 30 minute intervals. This strengthens the dough and improves the structure and appearance of the bread.
- After the last coil fold, let the dough rest for 30 minutes. Then, lightly spray your work surface with water and dump the dough out onto the surface. With wet hands, gently stretch the corners and edges of the dough outwards. Try to stretch it out as thin as possible but make sure to not tear it. Evenly spread the garlic paste over the dough and sprinkle it with the chopped rosemary. Fold the dough back up into a little package. Let the dough rise in a warm spot for another 1.5 hours until it looks bubbly and increased in size (about 50% increase). If the dough still looks dense, let it rise longer.
- Once the dough looks soft and airy, dump it onto your work surface and pre-shape it into a loose round. Let it rest for 30 minutes. Using a bench scraper, flip the dough over and shape it into a round loaf. Place it into a floured banneton with the seam-side facing up. Cover the banneton with a plastic bag and place it in the fridge overnight for the final proof. The cold, slow fermentation provides extra flavor and aroma.
- The next day, pre-heat the oven to 230° C. Turn the dough out of the banneton onto a piece of parchment paper. Using a sharp knife, score the top of the dough and bake the bread with steam for the first 10 minutes. Then, briefly open the oven door to release the steam and finish baking for another 20 – 25 minutes, until deeply golden brown. The baking time may vary depending on your oven. The bread is done baking, if it sounds hollow when tapping the bottom of the loaf with your knuckle. You can also use an instant-read thermometer to check for doneness. The internal temperature should reach at least 93° C. Remove the bread from the oven and let it cool completely before slicing. This allows the internal structure of the bread to set and improves the crumb. Slicing the bread too soon can result in a gummy or doughy texture.
Video
@notjustfood_blog Let‘s make roasted garlic sourdough bread with rosemary and olive oil. Perfect to accompany soups, stews or salads. ✨ #garlicbread #sourdoughrecipe #breadbaking ♬ Cupid – Twin Ver. (FIFTY FIFTY) – Sped Up Version – sped up 8282
Nutrition
Do you have any questions about this recipe?
Let me know in the comments!
Will baking in a Dutch oven work?
Hi Judith! Yes, a dutch oven works fine! You can bake it with the lid on for the first 15 -20 minutes and then remove the lid and finish baking until the the crust is browned to your liking. 🙂