Easy Guide to Create and Maintain a Stiff Sourdough Starter
Are you curious about sourdough baking but don’t know where to start? This guide is here to help! Learn how to create a stiff sourdough starter from scratch and maintain it with minimal effort. A strong and active sourdough starter is the foundation of successful sourdough baking. In a nutshell, a sourdough starter is a natural leavening agent to make bread rise instead of using commercial yeast. Creating a starter from scratch is very simple, but it takes a bit of patience: All you have to do is mix flour and water and wait for the natural fermentation process to work its magic. The starter creation process takes about 7 days from start to finish. Hang in there, and you will be rewarded with a loyal companion for your sourdough baking adventures. Once your starter is active and well established, it’s important to take good care of it. Don’t worry, it’s easier than you might think. My simple sourdough maintenance routine is effortless and doesn’t require daily feedings.

What Is a Sourdough Starter?
A sourdough starter is a naturally fermented leavening agent that can be used to raise bread and other baked goods instead of using commercial yeast. Bread leavened exclusively with sourdough is called “naturally leavened”. Aside from its leavening power, sourdough is also known for its flavorful taste and is said to be more nutritious and easier to digest. Sourdough isn’t literally “sour” dough. Depending on how you cultivate and maintain your starter, you can achieve either a mild or more tangy flavor profile. A sourdough starter can also easily be turned into a sweet leaven and works wonderfully to raise sweet baked goods.
To create a sourdough starter from scratch, flour, and water are combined and left in a warm spot to naturally ferment over the course of at least 7 days. Each day, some of that mixture will be discarded, and the remainder will be replenished with fresh flour and water. Over time, the starter develops a stable culture of wild yeasts and beneficial bacteria needed to raise bread dough. These microorganisms feed on the sugars in the flour and produce carbon dioxide bubbles, which make the starter rise and leaven the dough. Once they have consumed all the “food” available in the jar, the starter will collapse and get hungry. Eventually, the bubbles disappear, and it’s time to feed your starter again. Then the cycle repeats.
What’s the Difference Between a Stiff Sourdough Starter and a Liquid Starter?
The key difference between a stiff starter and a liquid starter is the hydration level. Most regular sourdough starters are kept at 100% hydration, which means they are fed with equal parts of water and flour by weight. Stiff starters are kept at a lower hydration level (usually anywhere from 50% – 65 %) and will contain double the amount of flour as compared to the amount of water. Liquid starters have a batter-like consistency, whereas stiff starters have a consistency similar to bread dough. Both types of starters work equally well to leaven bread, but have different beneficial properties. It mostly comes down to personal preference which type of starter you want to cultivate. A liquid starter can easily be turned into a stiff starter by adjusting the flour to water ratio and vice versa. I’ve experimented with both types of starters and personally prefer to work with a stiff starter. Here’s why:
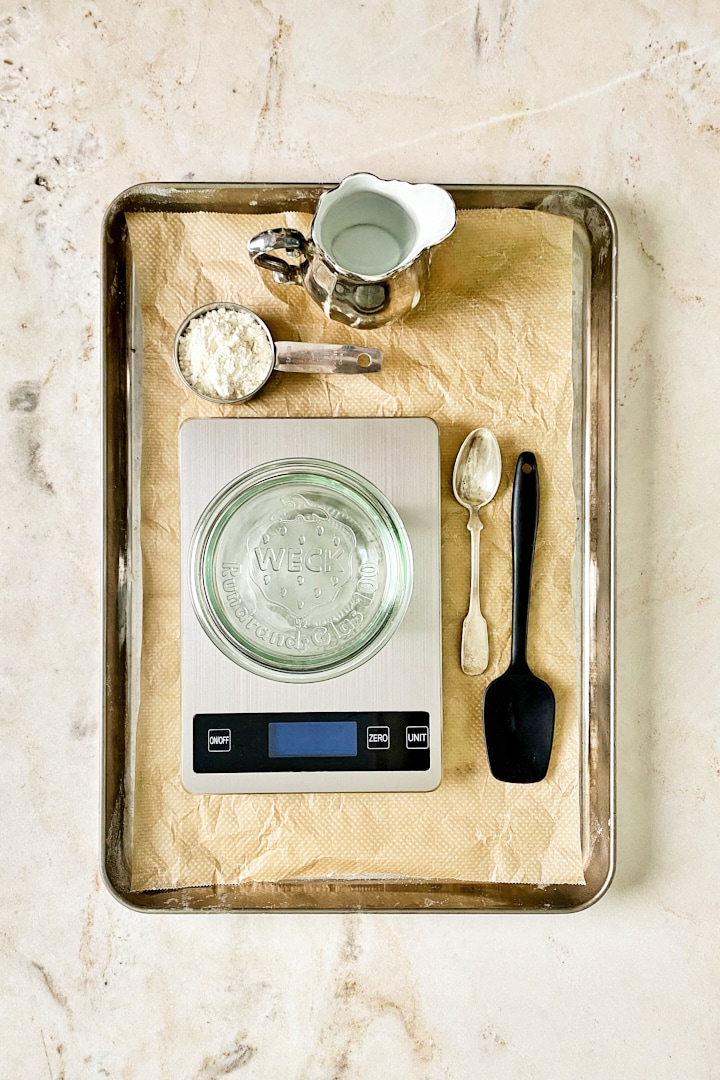
Ingredients and Tools You’ll Need
How to Make a Sourdough Starter From Scratch
Day 1
In a glass jar, mix 20 g of light rye flour, 20 g of lukewarm water and a bit of honey. Stir until well combined. Cover loosely with a lid and let it sit in a warm spot (ideally 26 -30° C) for about 12 hours. In the winter, you can place it in the oven with a hot water bottle on the bottom rack to create a nice and warm environment for the starter to rise in.
In the evening, give it a good stir and let it rest in a warm spot overnight. Stirring it down in the evening redistributes the food for the bacteria and boosts fermentation activity.
Day 2
Add 20 g of light rye flour, 20 g of lukewarm water and a tiny bit of honey to the jar. Stir to combine and let it rest in a warm spot.
In the evening, stir it down again and let it rest until the next morning.
Day 3
Between Day 2 and Day 3, you might see an initial burst of fermentation activity. The starter might have a mousse-like texture, and it’s common to see lots of air bubbles on the sides of the jar.
Discard half of the starter mixture and add 20 g of rye flour, 20 g of lukewarm water and a tiny bit of honey. Stir to combine.
In the evening, stir it down again.
Day 4
On Day 4, you will introduce some all-purpose flour and reduce the amount of rye flour.
Discard half of the starter. Add 10 g of rye flour, 10 g of all-purpose flour, 20 g of lukewarm water and bit of honey. Mix well to combine.
In the evening, you might see some growth again, with lots of air bubbles on the surface and the sides of the jar. Stir it down and let it rest until the next morning.
Day 5
Discard all but 30 g of the starter mixture. Add 30 g of lukewarm water and 30 g of flour. You can continue to feed it with a blend of rye and all-purpose flour, or switch to using only wheat (or any flour of your choice). I prefer to keep a wheat starter, as it tends to produce a milder and less tangy taste.
Stir it down in the evening.
Day 6
On Day 6, you will feed your starter in the morning and evening. You will also increase the flour to water ratio to turn your liquid starter into a stiff starter.
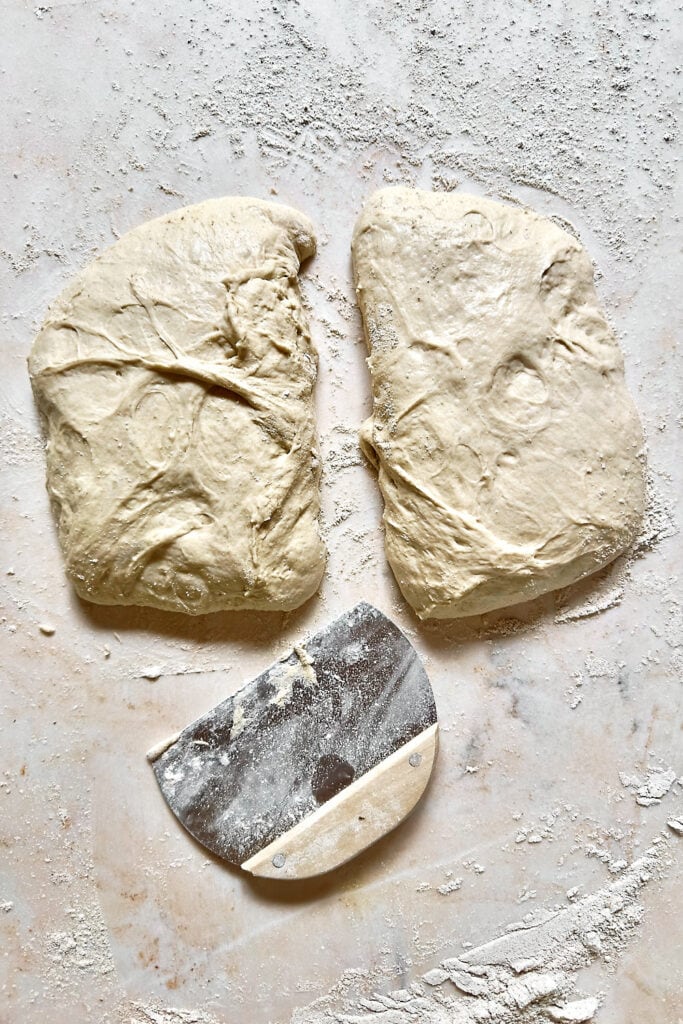
In the morning, discard everything but 30 g of the starter. Add 30 g of lukewarm water and dissolve the starter in the water. Add 60 g of flour. The texture of the starter will now be similar to bread dough. Use a fork to bring everything together into a shaggy dough. Then, briefly knead it on the counter until smooth and well combined. The texture of the starter is quite firm and easy to work with, so it shouldn’t stick your hands. Put it back in the jar and let it rest.
In the evening, repeat the same steps as in the morning.
Day 7
Repeat the same steps as on Day 6. Observe your starter and take note of how quickly it rises and falls. At this stage, your starter should show consistent signs of fermentation (doubling in size, lots of air bubbles, a mildly sour and yoghurt-like aroma). If your starter reliably rises and doubles in size within 4-6 hours after feeding, it’s a good indicator that it’s active and ready to use.
Day 8 and Onward
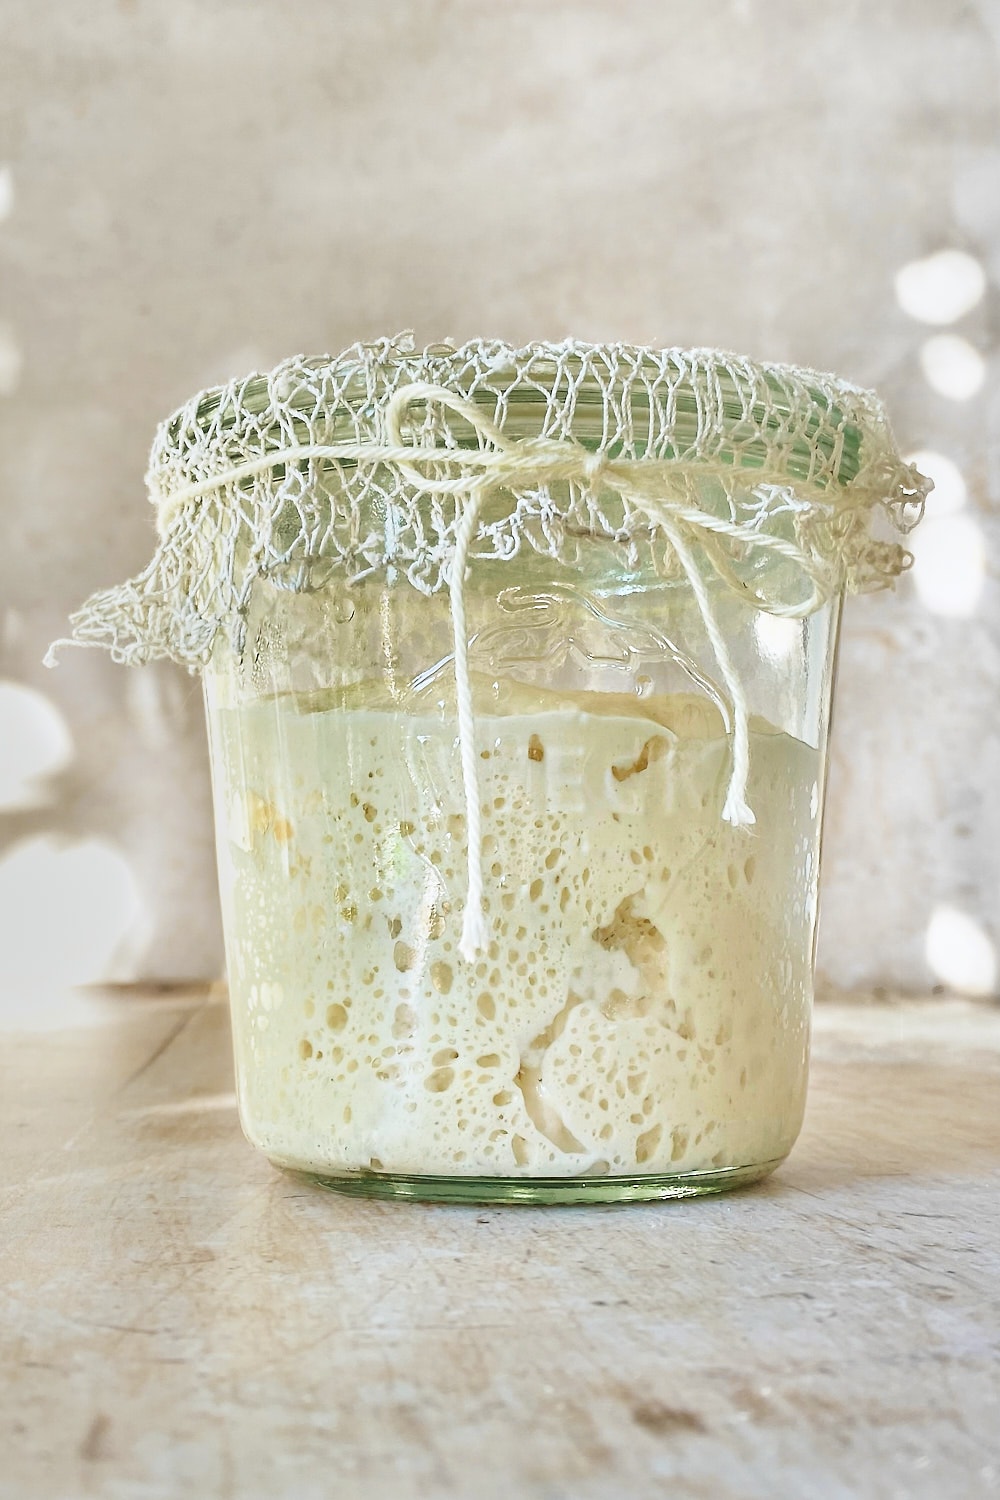
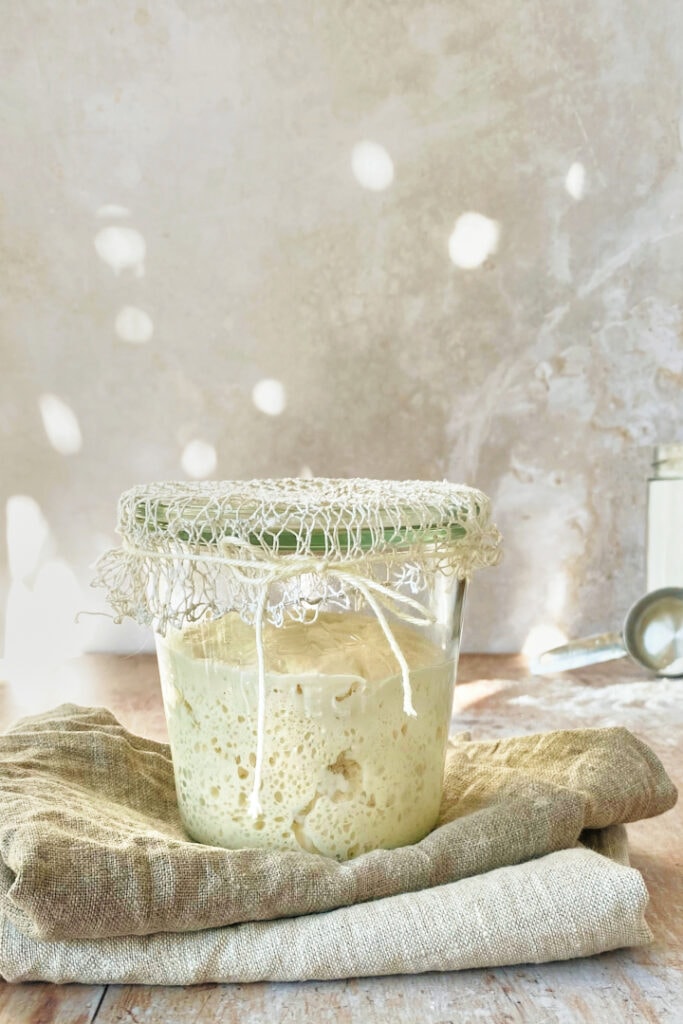
Discard everything but 30 g of the starter, add 30 g of lukewarm water and 60 g of flour. Stir and knead to combine. Let it rise in a warm spot. The starter is ripe and ready to use when it has significantly grown in size (doubled or even tripled), contains lots of air bubbles, has a pleasant dairy-like aroma and a slightly domed top. If it’s not active yet, continue to feed it twice daily for a few more days.
See pictures below for reference: The first image was taken in the morning right after feeding. The second image was taken 5 hours later when it was ripe and ready to use. Please don’t attempt to bake with a new starter if it’s not active yet. It will not produce satisfactory results.

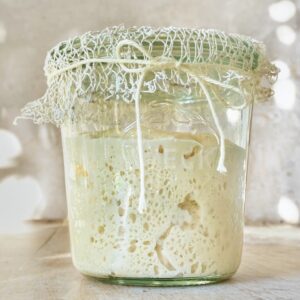
Starter right after feeding it. -
Active and bubbly starter 5 hours after feeding it.

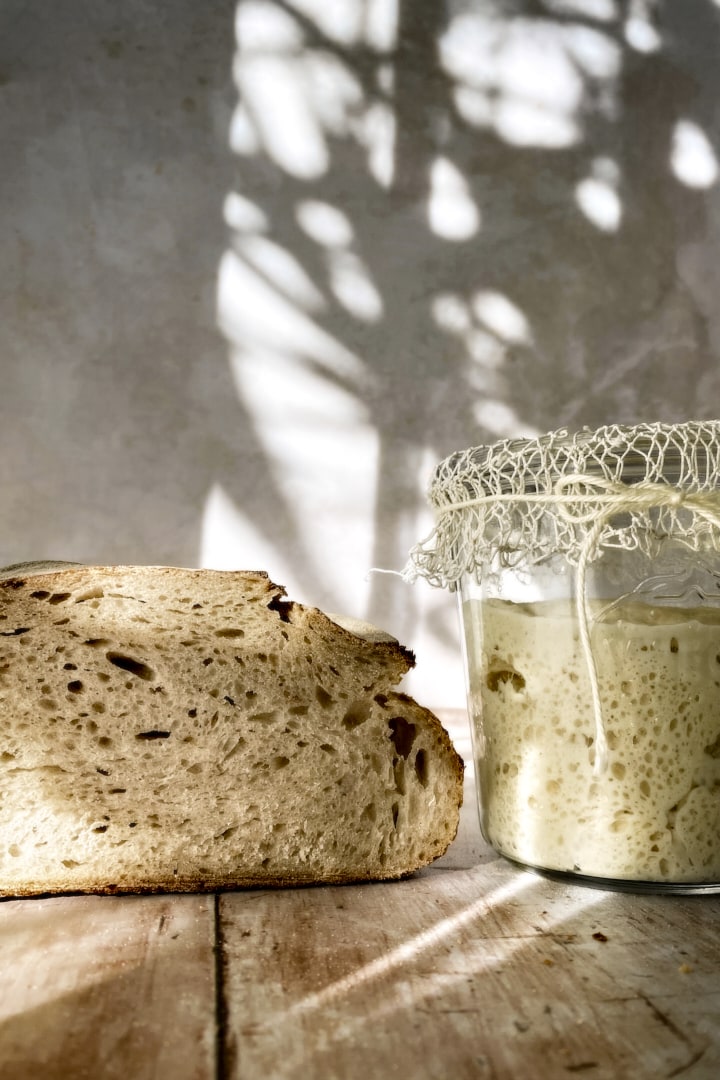
Congrats! When your starter is ripe, you are ready to bake your first simple same day sourdough bread.
Alternatively, if you don’t want to bake yet, store your starter in the fridge and follow my simple sourdough maintenance routine explained below.
Sample Feeding Schedule
Day 1
Day 2
Day 3
Day 4
Day 5
Day 6
Day 7
Day 8
Common Questions About Sourdough Starters
More Sourdough Recipes You May Like:


How to Create and Maintain a Stiff Sourdough Starter
Equipment
- Digital kitchen scale – for best results, always weigh your ingredients. It's more accurate than measuring by volume.
- Glass jar with lid – I like to use Weck 0.5 liter jars. It's the perfect size to keep a smaller starter and has a wide mouth which makes mixing the starter a lot easier.
- Silicone spatula or spoon – to mix the water and flour.
Ingredients
- 70 g Light Rye Flour I recommend using a mix of light rye flour and all-purpose flour. Rye flour provides more nutrients to boost your starter and kick-start the fermentation process. Once your starter is strong and well established, you can maintain and refresh it with any flour of your choice. I, personally, keep a wheat starter, as I've found that it produces a milder taste is more versatile to use in different recipes.
- 340 g All-purpose Flour Look for a protein content of 11-12 %
- 260 g Water Lukewarm (around 30° C)
- Raw honey – optional but recommended. Raw honey contains wild yeasts and beneficial bacteria to speed up the fermentation process.
Instructions
How to Create a Stiff Sourdough Starter From Scratch
Day 1
- In a glass jar, mix 20 g of light rye flour with 20 g of lukewarm water and a bit of honey. Stir until well combined. Cover loosely with a lid and let it sit in a warm spot (ideally 26 -30° C) for about 12 hours. In the winter, you can place it in the oven with a bottle of hot water on the bottom rack to create a nice and warm environment.
- In the evening, give it a good stir and let it rest in a warm spot overnight. Stirring it down redistributes the food for the bacteria and boosts fermentation activity.
Day 2
- Add 20 g of light rye flour, 20 g of lukewarm water and a tiny bit of honey to the jar. Stir to combine and let it rest in a warm spot.
- In the evening, stir it down again.
Day 3
- Discard half of the starter mixture and add 20 g of rye flour, 20 g of lukewarm water and a tiny bit of honey. Stir well to combine.
- in the evening, stir it down again.
Day 4
- Discard half of the starter. Add 10 g of rye flour, 10 g of all-purpose flour, 20 g of lukewarm water and a bit of honey. Mix well to combine.
- In the evening, stir it down again.
Day 5
- Remove all but 30 g of the starter. Add 30 g of lukewarm water and 30 g of flour. Mix well to combine. You can continue to feed it with a blend of rye and all-purpose flour or switch to using only wheat (or any flour of your choice).
- Stir it down in the evening.
Day 6
- Discard everything but 30 g of the starter and add 30 g of lukewarm water. Dissolve the water in the starter and add and 60 g of flour. The texture of the starter will now be similar to bread dough. Use a fork to bring everything together into a shaggy dough, and then briefly knead until smooth and well combined. The consistency of the starter is quite firm and easy to work with, so it shouldn't stick your hands. Put it back in the jar and let it rest.
- In the evening, repeat the same steps as in the morning.
Day 7
- Repeat the same steps as on Day 6 and feed in the morning and evening. Observe your starter and take note of how quickly it rises and falls. At this stage, your starter should show consistent signs of fermentation (doubling in size, lots of air bubbles, a mildly sour and yoghurt-like aroma). If your starter reliably rises and doubles in size within 4-6 hours after feeding, it's a good indicator that it's active and ready to use.
Day 8 and Onward
- Discard everything but 30 g of the starter and add 30 g of lukewarm water. Dissolve the starter in the water and add 60 g of flour. Mix with a fork to bring it together into a shaggy dough, and then briefly knead until well combined. Let it rise in a warm spot. The starter is active and ready to use when it has significantly grown in size (doubled or even tripled), contains lots of air bubbles, has a pleasant dairy-like aroma and a slightly domed top. If it's not active yet, continue to feed it twice daily for a few more days. Congrats! When your stater is active your are ready to bake your first sourdough bread.Alternatively, if you don't want to bake yet, store your starter in the fridge and follow my simple sourdough maintenance routine explained below.
How to Maintain a Stiff Sourdough Starter
- Discard everything but 30 g of the starter. Add 30 g of lukewarm water and dissolve the starter in the water. Add 60 g of flour and use a fork to bring everything together into a shaggy dough. Briefly knead until smooth and well combined. Place it back in the jar and cover loosely with the glass lid.
- Let it rise in a warm spot (26-30° C) until ripe and doubled in size. In a warm environment, this usually takes anywhere from 4 – 6 hours. In lower temperatures it will take longer.
- Remove the amount of starter required for a recipe and make bread dough.
- Place the jar with the remaining starter (about 30 g) in the fridge for the next use.
- Feed your starter when you plan to bake again and repeat the process. This is an ongoing cycle, so whenever you make bread, you only keep a small amount of the remaining starter and store it in the fridge. This small amount of starter will then be replenished with fresh flour and water, left to rise and turns into the leaven for your next bread. Then you'll keep a small amount of the new leaven, store it in the fridge and the cycle repeats.
Hallöchen, habe soeben deine Seite entdeckt und leider auch einen Fehlerteufel. Die Aufzählung der Tage sind nicht Nacheinander. Tag 1 und dann Tag3… Tag 2 kommt irgendwann später. Ich schaue grad mit einem Android Handy, falls es ein Browser Problem ist. Ansonsten schöne Seite… und bitte mehr Brot Rezepte. Gruß Stipe
Hallo Stipe! Freut mich sehr, dass du auf meiner Seite gelandet bist! Vielen Dank für deinen Hinweis! Du hast vollkommen Recht, die Anordnung der Tage auf der mobilen Ansicht war komplett durcheinander. Ich habe die Seite nun aktualisiert und die Darstellung sollte jetzt richtig sein. Es kommen schon bald viele neue Brot Rezepte! Liebe Grüße! Julia
Does a stiff starter produce more volume than a 100% hydration starter?
Hi Tina! A stiff starter will also double or triple in size after feeding (same as a liquid starter). The only difference is that you are using less water to feed the starter.